1 Top / 2 looks with Celizzione

Hey, hey! How is everyone?! Happy Wednesday — Friday is almost here. What are you’re weekend plans? We’re planning a quick family road trip 🙂 Can’t wait!

Today, I have a super fun post with Celizzione. They are one of the cutest online boutiques out there, y’all! Not to mention, their prices are wallet-firendly! I’m styled a lovely black top 2 ways – one daytime look and one evening look. The versatility of this top can’t be beat! Not only is it perfect for layering, but the lace detailing feels chic and unique. 

For my causal look I added a black hat, camo printed jeans, and fringe booties.                            Perfect for lunch with the girls! 

dsc_1325

dsc_1343
Also, in love with these sweet fresh water pearl studs from Cezillione!

dsc_1333

For a dressier look, I added a bold lip (LipSense of course), flared denim, metallic pumps, and gold clutch. I would totally wear this out on a date. Wouldn’t you?

dsc_1348dsc_1360dsc_1350

Check out Celizzione to read their Blogger Spotlight. Your’s truly is being featured!                 I’m very thankful for the opportunity! 

What’s your favorite day to night item hanging in your closet? 

Take care and have a fabulous day!

❤︎ ❤︎ ❤︎

XO

Let Them Make a Mess

img_4377img_4384img_4436img_4553img_4555-1img_4460

Happy Saturday, y’all! This was a another busy week, and I didn’t get my post up yesterday. But, I did a little event introducing my mini-boutique — it was so fun! Thanks again to everyone that came out!

I wanted to talk about something I have encountered as a mom. What I want to talk about isn’t revolutionary. It’s not going to make in the pages of Parenting Magazine or mentioned on the Today Show.

I just want to talk about kids making a mess.

Why? It’s just part of having kids, right? We all deal with cleaning the house, laundry, and, picking up toys. I know sometimes I have bribed (yes, bribed. You have too, right?) my son to clean the playroom. I’ve said something like, “If you clean up the playroom, we can go outside.” Or, “If the playroom is cleaned up, we can have a friend over.”

As much as we have to clean, it’s easy to resent this daily chore. Anybody feel like this? Trying to maintain a house, especially when the kids aren’t cooperating (or following chore rules) can create a lot of frustrating. 

That’s why this play session was a lot different.

The other day I was wanting to snap a pic of my kiddos playing. In order for me to do this in my house, I have to move my kitchen table. I know, crazy! It’s the only way I can get natural light with a white background, ha! But, I wasn’t planning on my little picture turning into something that inspired me.

While the kiddos were in the kitchen, I ran into the playroom and grabbed a puzzle and a bag pom poms. My daughter is obsessed with pom poms! 

After making back into the kitchen and giving them their goods, playtime quickly began. At first, there were only a few pom poms puzzle pieces on the floor, but that soon changed. They ended up All. Over. The. Floor. As the mess ensued, I could feel my anxiety rise, but I also noticed something else. My daughter was so clam and happy. She teetered around picking up and dumping pom poms. My son, played with his puzzle and then (queitly) joined in with his sister. What did I do? I watched. I played on my stomach and admired their sweetness. I snapped a many pics as I could. I wasn’t going to miss this little moment. This memory will stick me. A simple memory of I time that I put my Mom duties on pause and let them just play.

I put aside all of the chores, to-do’s, and rules. I just watched them play.

 I don’t have a spick and span hosue, but I like to keep things picked up. I’m also not super super hard on my kiddos. But, I do quick a little worked up when my house gets messy. Why? My anxiety! I can control what chores get done. I can control the mess. Yeah, I’ll stop there. Another day, another post, ha!

Next time the kids want to make a mess, let them. It can always be picked up. I’m glad I let them make a mess in my kitchen. I second guessed myself, but I’m happy I flipped my “mom” switch off and just watched them play. It was exhilarating and motivating. Kinda like, “You got this girl!”

Oh, if I could bottle that moment!

Do you recall a favorite Mom moment? Please share below!                                                      I would love to hear you story.

Have a fab weekend, y’all! Hugs to all of you mommas out there! 

 ❤︎ ❤︎ ❤︎

XO

Pattern Mixing with The Shoe Closet

img_2806img_2803img_2807img_2808img_2804

Hi there, y’all! I hope you are doing well! Did you survive Halloween? Whew, we did. And we had a lot of fun! My husband liked his gifts and his b’day cake. I made the easiest Oreo dump cake. I’m thinking I may need to share it here on the blog. If you would like to see it, let me know in the comment section below.

Today’s post is the last post with The Shoe Closet. If you’re just now following along with my posts about TSC, here’s a refresher. 

Located in Wichita Falls, Tx, The Shoe Closet has been the heartbeat of fashion in Texoma since 1984. With personalized styling and a warm atmosphere, the Shoe Closet is the go-to place for all things trending. They carry brands like Alice + Olivia, Tory Burch, and the upcoming accessory line Rory Ashton. Personally, I’ve been shopping at the Shoe Closet since high school. I have always appreciated their on-point advice and diverse merchandise. I’ve really enjoyed sharing so many fun looks that TSC has to offer.

Pattern play is one of the easiest trends to rock!

Whether you wearing a patterned mixed baseball tee, layering a striped tee under a floral print cardigan, or adding a polka dot blouse under a gingham sweater, pattern mixing can be achieved on any level.

My number 1 tip: Don’t be sacred of looking too busy. If you’re wearing pattern on top, keep it simple on the bottom, or vice versa. You can wear a full patterned look. I suggest staying within the same color family and having one main print with smaller, complimentary prints. 

For this Shoe Closet look, we have a leopard print top under a reversible camo/fur jacket — instant chic! As for the denim, TSC’s Hudson jeans are black, stretchy, and have grommet detailing down the leg. How cool would these look with a simple white tee and sunnies? Again, instant chic! And to top it off, the Jeffrey Campbell booties. These are next level. The adorn heel is very big this fall/winter! TSC is always in the know in regards to footwear trends.

NEWSFLASH! You can now shop The Shoe Closet online!  They are having an anniversary till Saturday. Check it out here.

tsc-anniversary-sale

Again, a big thank you to The Shoe Closet for allowing Serena and I to shoot and share your looks! We had a blast! 


Have any questions on how to wear pattern?

  Shoot me an email at yourgalnextdoor@gmail.com or comment below. 

The Gal Next Door would love to style you! 

❤︎❤︎❤︎

XO

DIY Spider Headband

Hi y’all! As I always say, Happy Friday!! Have any fun Halloween plans? Just today, we’ve tackled two parties and several outfit changes, including a TNMT. Fun times!

Halloween is a very special day around out house, it’s my hubby’s b’day! We can’t wait to celebrate him. Aren’t birthdays the best?

Today, I’m sharing a fun and EASY diy project. After my last attempt a making caramel apples, I was a little weary of how this round of do-it-yourself would go. But, now that I think of it, everything probably went better because I wasn’t cooking. Ha!

Alright, y’all, fasten your seat belts for the easiest diy ever! 

Below is everything you need. I did add in some tulle! 

Hot Glue Gun
Headbands
Wiggly Eyes
Felt Squares
Pom Pom
Pipe cleaners
Tulle

dsc_1330
Love those little fingers!

I first used this cup to trace a circle. I ended up making the circles a little bit smaller. I recommend just cutting two small circles, it doesn’t have to be exact.                                        No measuring needed.

dsc_1345dsc_1352

Glue one circle on the headband and then sandwich the other on top.

dsc_1355

Next, grab four pipe cleaners and cut them in half. You will have eight pieces. 

dsc_1373dsc_1385

Apply a generous amount of hot glue to the felt circle.                                                                  Place four pipe cleaners on each side of the circle. I tried to space them out as evenly as possible. Ya know, like a real spider –wink, wink! 

dsc_1387

After letting the hot glue sit for a couple minutes, I cut a few scraps of tulle and twisted them together. I then applied hot glue on the tulle. No, this does get a little tricky. I had to use a pencil to push some of the tulle down. That being said, it sticks pretty well! 

dsc_1389

 
Meet the Spider Headband!

dsc_1391-1

A few thoughts…

You may need to trim the legs. Depending on who is wearing it, the legs can be a little long for a young child’s head. 

Also, you don’t have to use a headband. You can use this same method, without using a headband. Placing a spider on a solid colored cap would be a fun alternative! 


Ok, just like every parent, I wanted a cute picture. I actually made a headband for myself (minus the pom pom), and I wanted to get a picture of us today. And, well, you can see how she felt about that. 

It’s like she was saying, “Ain’t got time for that, Mom!” 

img_3626-2-1

I was amazed at just how easy and fun these were. Plus, I had a sweet little helper! Even though she had a melt down, she did enjoy helping me. If you have young ones, I recommend letting them play with the pom poms. I gave Camila a baggy and she enjoyed picking the pom pom ups. I mean, if she wants to help clean up, I’m not going to stop her!

I hope y’all have a super fun and safe Halloween. Chat soon!

❤︎ ❤︎ ❤︎

XO

What’s in your diaper bag?

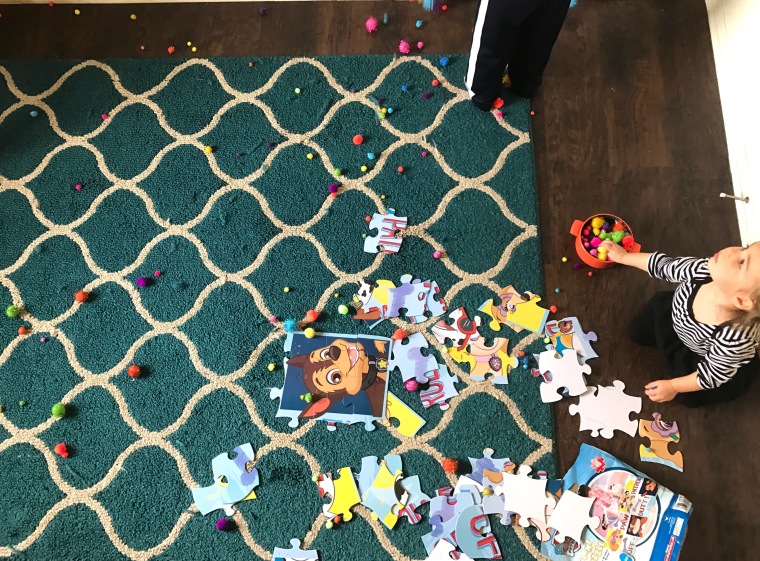
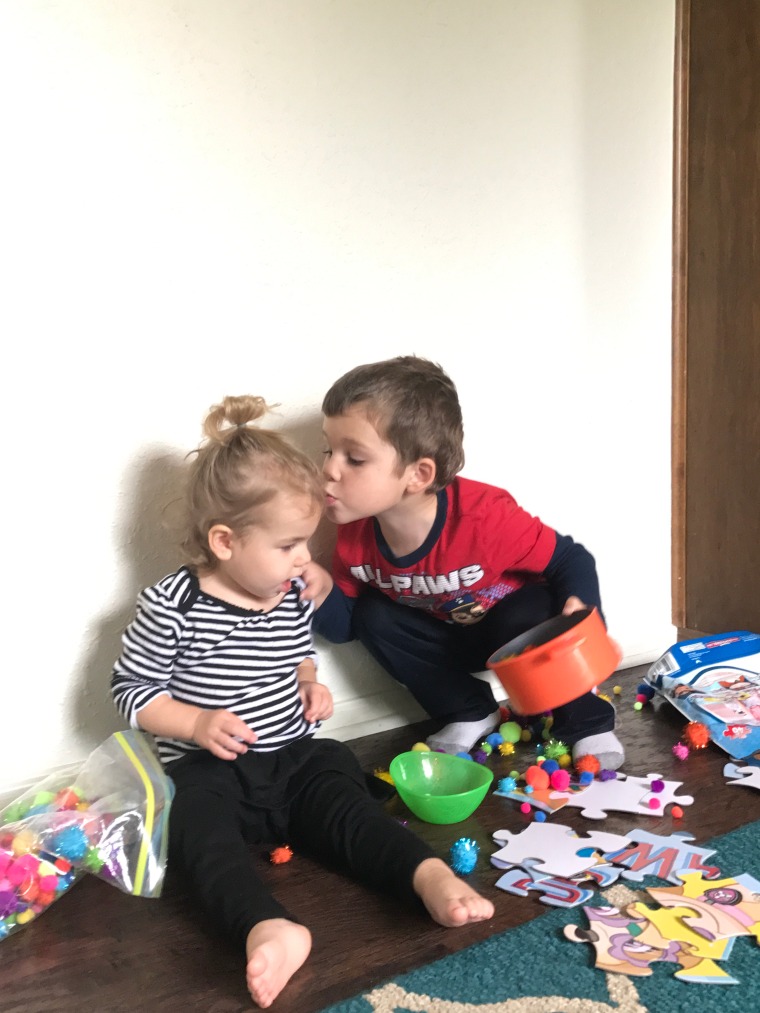
Hey, hey! It’s the best day of the week! I hope you have had a great week, and have an even better weekend planned. I currently have a baby in my lap who is coming down with a fever. Oh my, my kiddos! My heart is breaking for them. If you’re dealing with sick babies, sending prayers for a quick recovery.

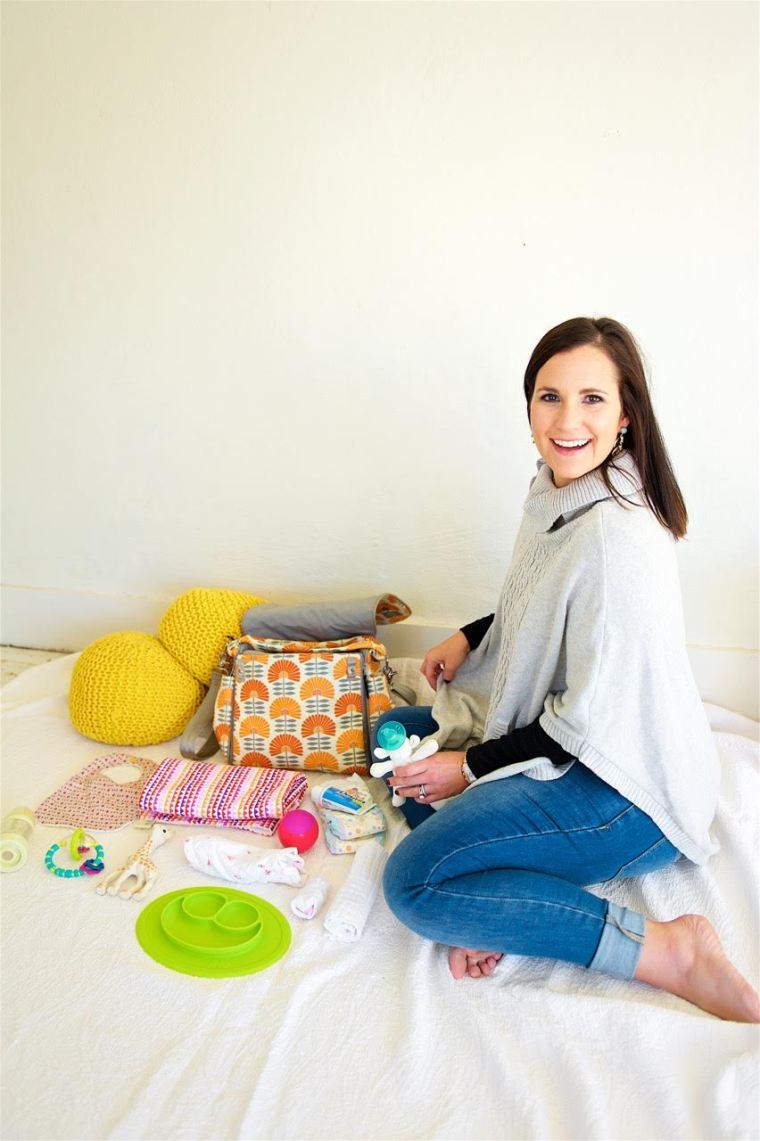
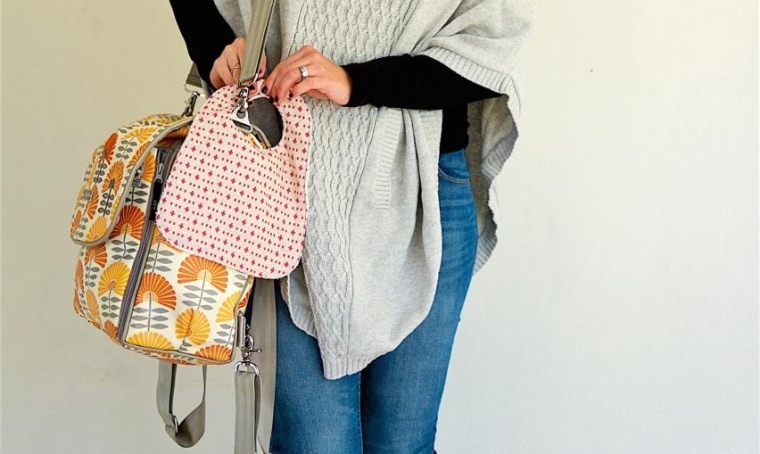
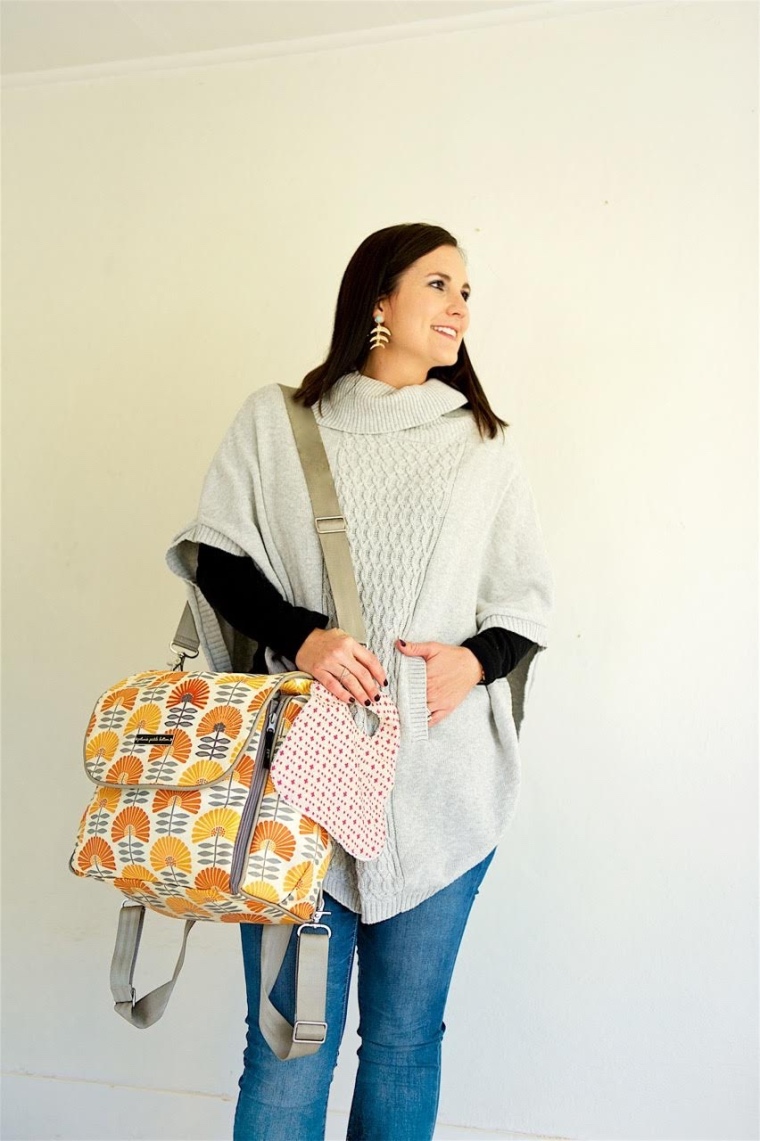
Speaking of kiddos, today I’m sharing my diaper bag essentials. If I could show y’all what my diaper bag (not to mention me — total hot mess!) looked like for my first outing after having my son, you would you get a really good laugh in. Seriously! My mom walked into my house and said, “Tori, do you need all of this?” I frantically replied, “Yes!” We left the house and hour and half later. An hour and a half. Being a new mom is no joke! I totally sympathize and appreciate new moms, and that’s what motivated this post. With the help of my sweet photographer, I wanted to share the items that are necessary versus the things you “think” you will need in your bag. For instances, a burp cloth is a staple item, not a finger nail file. Let’s face it, you just brought a new human into the world, the last thing on your mind is your nails.

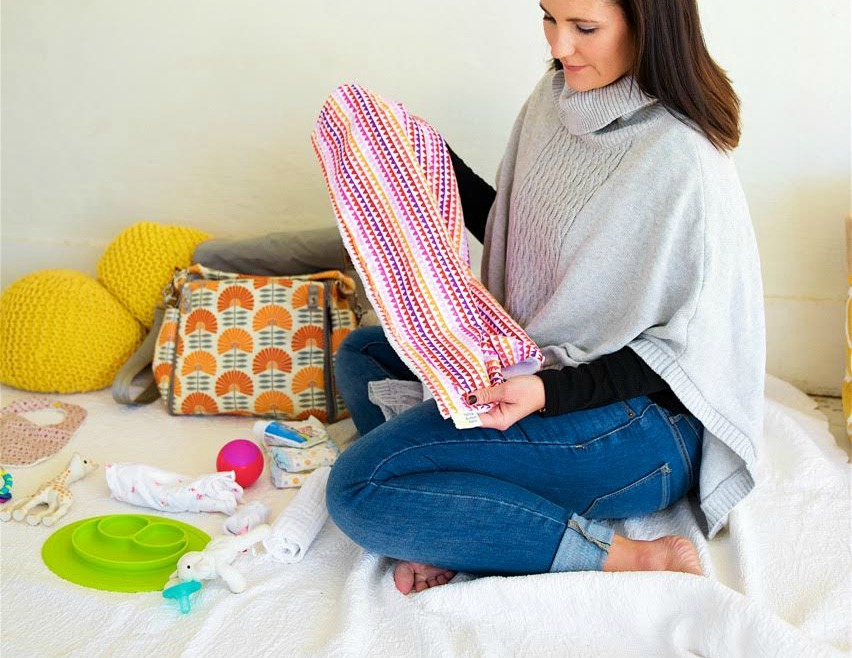
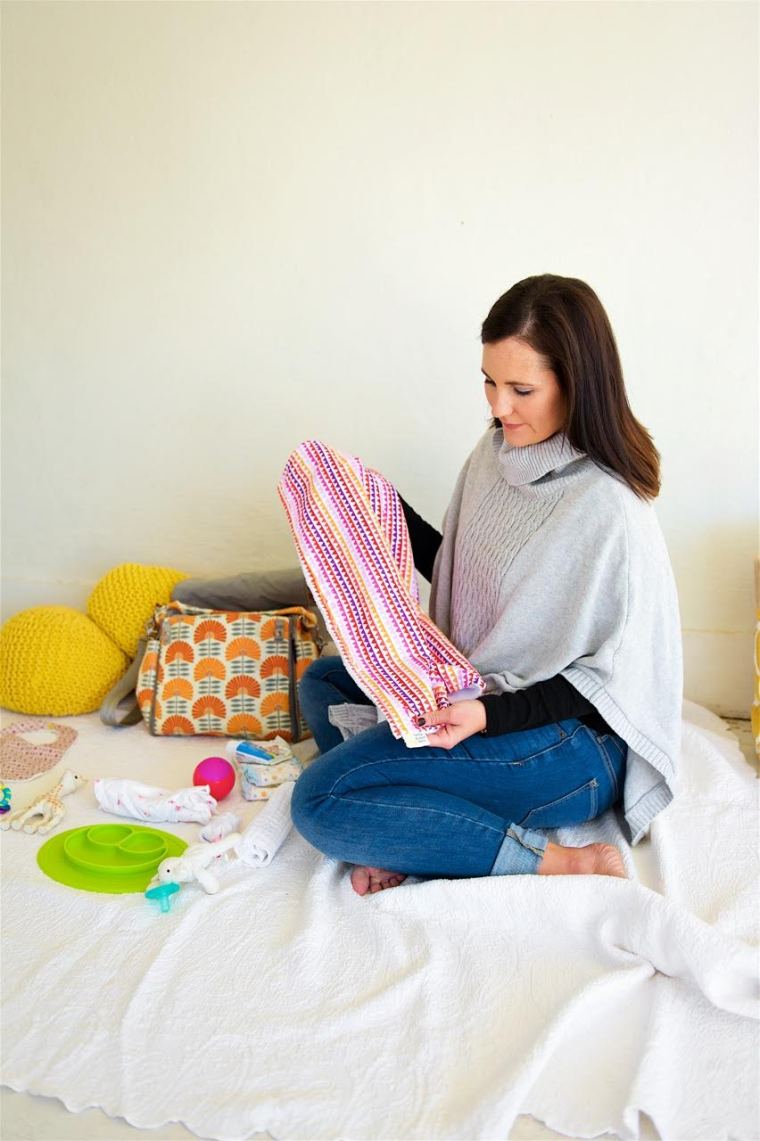
Also, I’m sharing two fabulous items from one of my sorority sister’s baby line called Yellow Button Baby. I have known her since 2005 and she’s a doll! I’m showcasing her super soft, double sided baby blanket and bib. Both are machine washable and in colorful patterns. In fact, the bib is a brand new pattern for her fall collection. Check out Yellow Button Baby and pick up a few essentials for baby!

Enter thegalnextdoor at checkout to receive 15% off of your order!

Now, time for my favorite diaper bag items.

unnamed-6

Pacifiers

Oh, the Wubba Nub. These infant passies are perfect for not only soothing baby, but for keeping little hands busy. Available with many different animals, these passies are great for the new mom! Although, my kiddos didn’t use the Wubba Nub, I have met countless moms who swear by them. I tried to introduce them, but by the time my kids would take a passie, they were passed the infant stage. So, we use the MAM pacifiers. My daughter is enjoying one as we speak!

Both are great, both will soothe baby! 
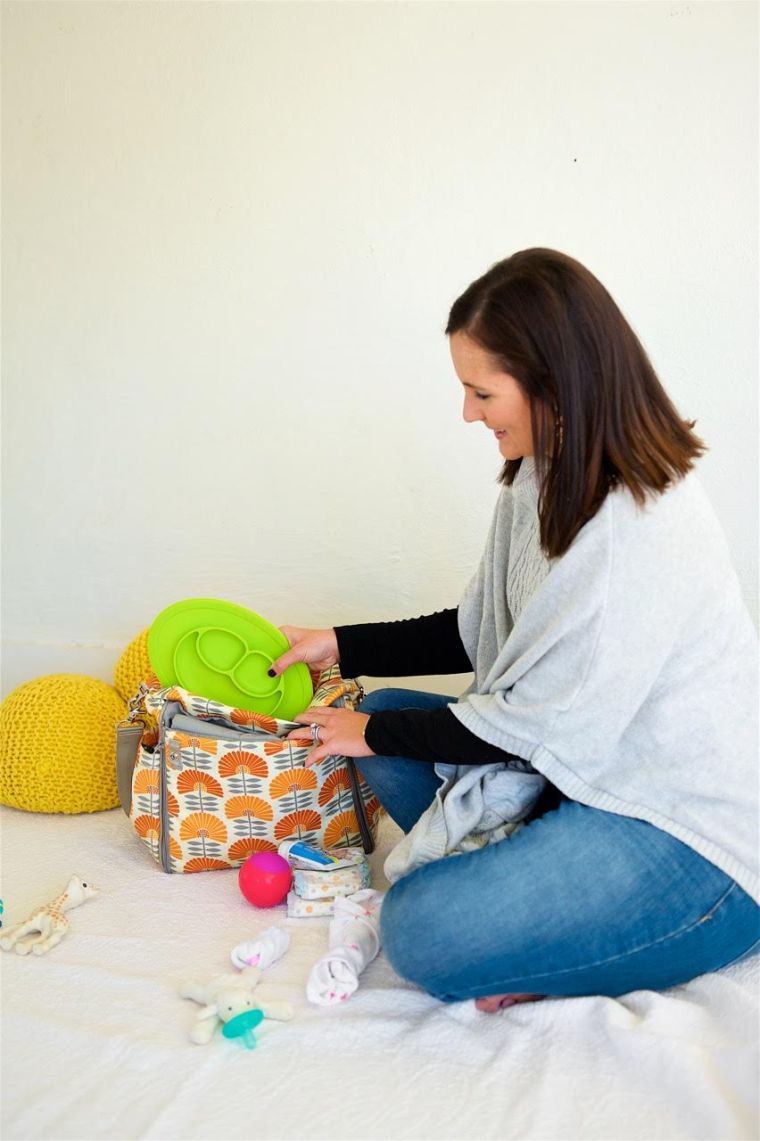
Toys

Also, we can’t forget about the toys. I overloaded my bag with toys. Like, a new toy for every hour I was going to be out. Eek! Overload. What I’ve come to realize, is kids that don’t need that many toys. 1-2 is great, but more than that is just going to take up space in your bag. Not to mention, observing their surroundings can be fun and help them develop.

sofie-the-giraffe

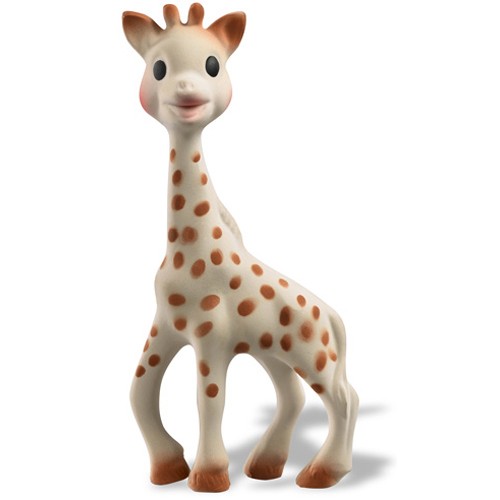
My top toy for my kiddos was the Sofie. I don’t know what kind of magic they put into these little squeaky giraffes, but they are kid magnet. For real. They are also perfect for teething! 

Yellow Button Baby — Toddler Blanket & Bib

Yellow Button Baby’s Travel Blanket is amazing! It’s handmade, machine washable, and super soft! Perfect for the mom on the go. And how cute is this pattern? YBB’s blankets are available in three sizes. This is the travel blanket and I love the portability!

unnamed-3

Yellow Button Baby’s toddler bib is perfect for a busy mom. It can be attached to the outside of your bag, is thin enough to roll up ( and not take up a bunch of room), and snaps behind baby’s neck. When your child can remove their own bib, things can get a little yucky. That’s one more reason I love this bib. I know my daughter can remove it mid-meal.

Made of quality fabrics, including cotton and bamboo, these bibs are colorful and can be personalized. How fun!

unnamed-4

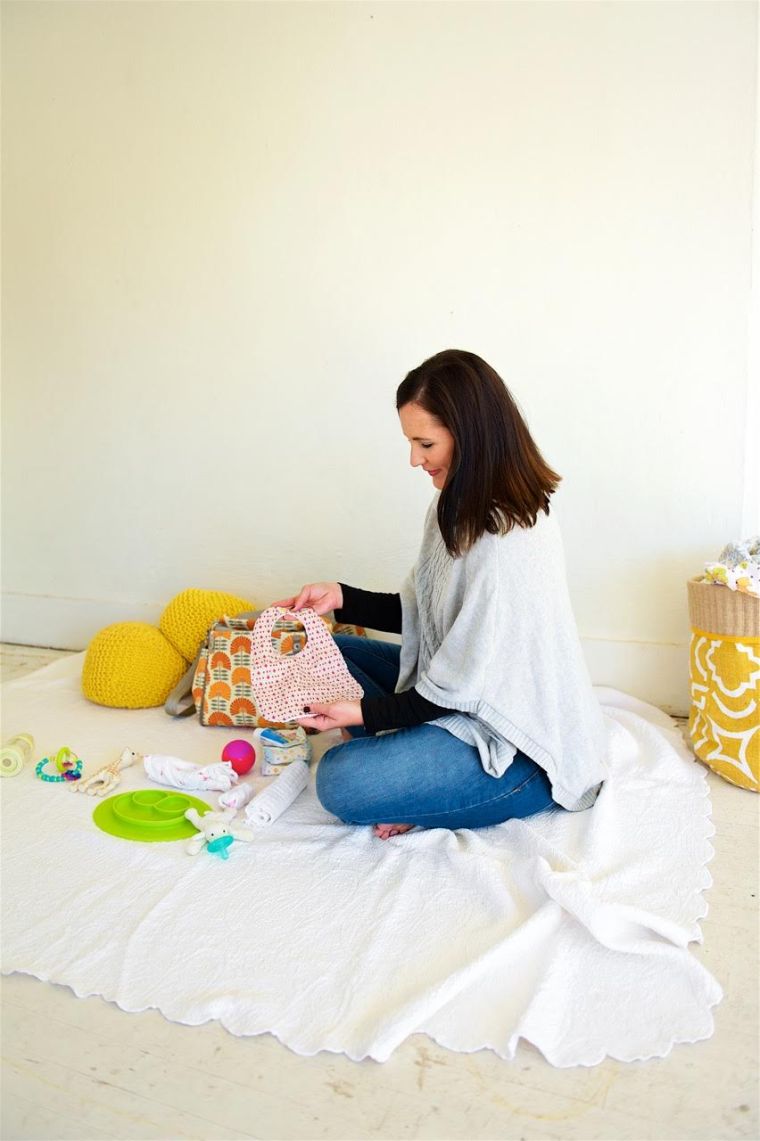
This bib is so versatile — it snapped perfectly on to my diaper bag. Of course, with a yellow snap button!

unnamed

Feeding

Have you tried an EZ PZ mini matt? These are life changing. As soon as baby starts to pick up food, I recommend you get one! They are dishwasher safe, free of any harmful extras (ya know, like BPA and PVC), and promote self feeding. Plus, they are perfect for eating out.

unnamed-5

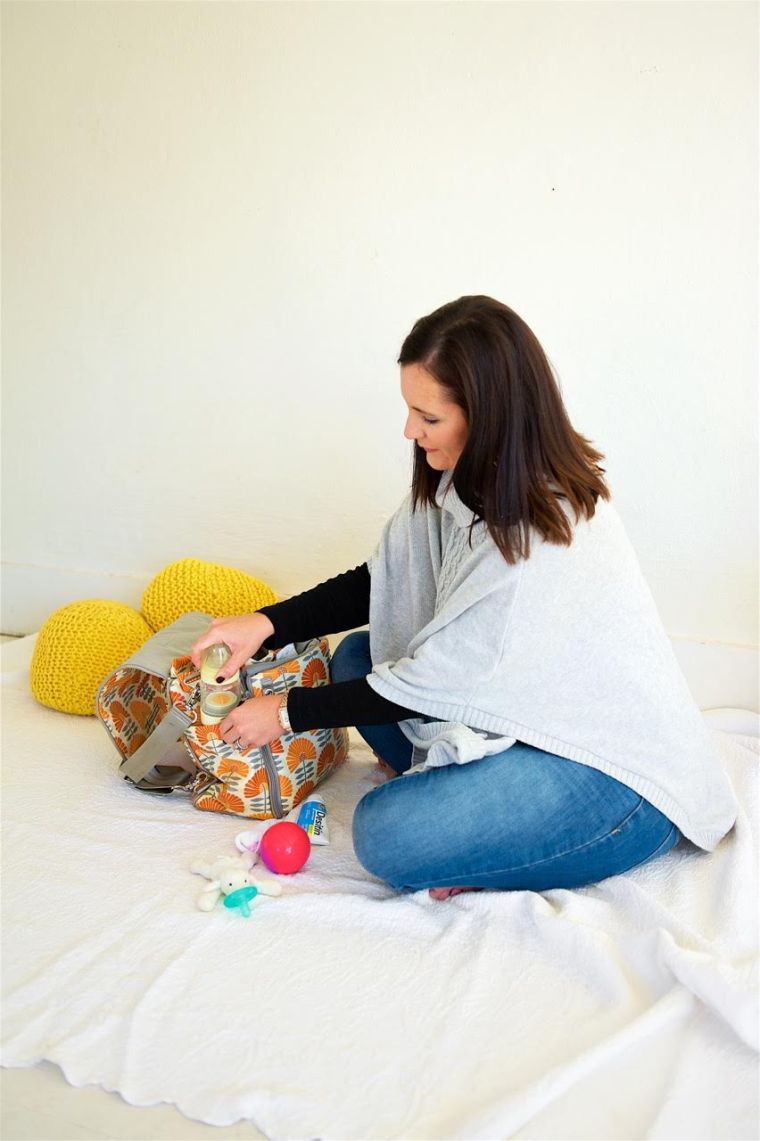
When I started to get out of the house more, especially with my son, I struggled with ways to carry my formula. Eventually, I found the Munchkin Formula Holder, but do I wish I one of the Mixie baby bottles. My photographer shared this fabulous product with me and I had to share it with y’all!

The Mixie bottle stores a serving of formula of in an extra compartment on the bottle of the bottle. You can fill the bottle with water before or when baby’s hunger strikes. Next, pop of the bottle of the bottle and shake. How genius is that?

unnamed-7

Diaper Ointment

Of course, Destin is always an essential. Blow outs and nasty diapers happen, that’s where this stuff comes into play. I also love A + D because of it’s waterproof consistency.
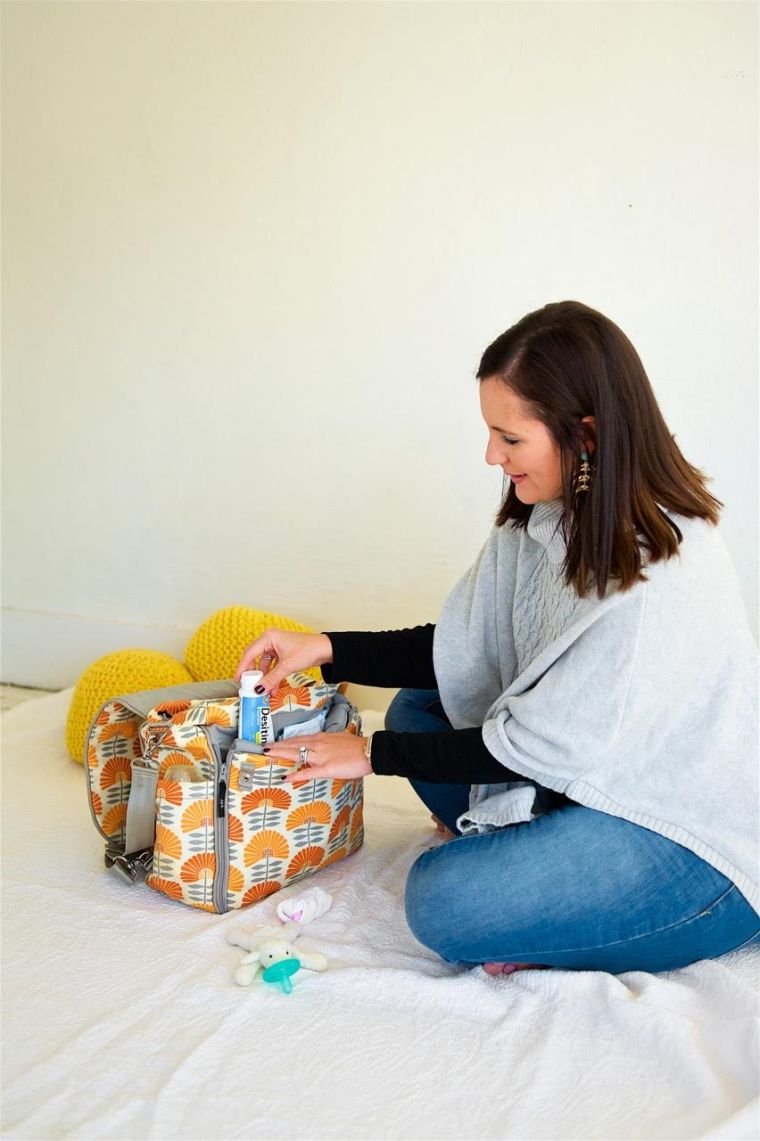
 unnamed-2

unnamed-1

Other Essentials

Some other great items that aren’t shown would be Infant Tylenol and Johnson & Johnson Cleaning Wipes. I’m constantly wiping my kiddos down. Germs everywhere, ha! 


I hope you find this informative and helpful. I’m my no means a mom genius –just simply sharing some of my favorite items in hopes of informing new moms. 

Feel like this would help a friend or family member? Share away! Motherhood is all about community. 

Have a great weekend y’all and I’ll see ya next week. 

❤︎❤︎❤︎

XO

* The Gal Next Door is a part of several Affiliate Marketing partnerships. I may make a percentage per click/purchase. All opinions are my own. Thank you! *

Brighten Your Smile with Smile Brilliant

Hey there, y’all! TGIF! We made it to the (almost) weekend. I hope you have a fun weekend ahead of you.

Are you a coffee drinker? Maybe Diet Coke or DrPepper is your drink of choice? I’ll be the first to say that I always reach for hot cup of java in the morning and sometimes a Diet Coke in the afternoon. Because of this, my smile has become a little dull.

That’s why I’ve teamed up with Smile Brilliant to share amazing at home whitening kit.

In the past, at home whitening has only been available after making a trip to the dentist and spending out 500+ for a full kit, plus whitening trays. I don’t know about you, but that is way over my price range.


Smile Brilliant saw a need for an at home, wall-friendly whitening kit.

They’ve created an affordable and easy kit that takes the fuss out of teeth whitening. Who wouldn’t want to brighten their smile while watching their favorite television show?

Upon receiving my kit, I quickly upon it to find simple instructions, whitening and desensitizing syringes, paste (for making the molds), and trays to place the paste in.

First step, follows the step by step guide to make my molds.dsc_0442

In your kit, you will find two types of paste. One is blue, one is white. Simply mixed these paste 1 blue paste and 1 white paste, and then add it to on the blue plastic trays. Place in mouth and press up. Make sure that you are pressing firmly, making sure that the paste touches your gum line. Repeat this step for the other tray.

dsc_0456dsc_0461

Next, rinse the trays and let them set up. This takes about 30 minutes.  Fill out the info card included in your kit and place them in the prepaid envelope provided. 

dsc_0514dsc_0515

Now, you wait! The professionals at Smile Brilliant work diligently and quickly to get you trays within a few days. Of course, you will receive emails regarding tracking.

unnamed-3

Within a few days you will have your new whitening trays. Now, it’s time to whitening.

Before you whitening, make sure your teeth and clean and dry. This will help the effectiveness of the whitening gel.

Open a (green) whitening syringe and place a ribbon of gel along the center on the tray. A little goes a long way. Place into mouth and wipe excess gel off of gums. Repeat for other tray.

unnamed

When you first began to whitening, I recommend starting with 30-45 minutes. After you have been whitening for some time you can bump up the allotted time to up to 3 hours. If you have any sensitivity to teeth whitening, I would start slow. While I did have some sensitivity, mine didn’t ever become painful.

I will say, my gums did get a little tender. The professionals at Smile Brilliant recommend that I applied a thin layer of Vaseline on my gum line before whitening—it acted as a “wall” between the get and my gums. This dramatically helped!

Also, another great product from Smile Brilliant is there desensitizing gel. This helps straighten enamel, prevent further staining, helps combat sensitivity. You use this before your whitening. Less sensitive, more results!

unnamed-2

Whiten according to your schedule. The more you whiten, the faster and more noticeable your results will be. As a mom, I found that nap time was the best time to whiten. Also, while getting ready in the morning. Now, my smile is brighter and I’m excited to show it off.

The professionals at Smile Brilliant were very helpful and always available to answer any questions I had.

I’m very happy with my results! 

smile-brillant-before-after

And what’s the best part of the post? I’m hosting a giveaway! Click here to enter. 

Check out this YouTube video and/or a few testimonials to find out more. Also, if you decide to purchase a kit use galnextdoor to receive 5% off! 

Have a good one, y’all!

❤︎❤︎❤︎

XO